
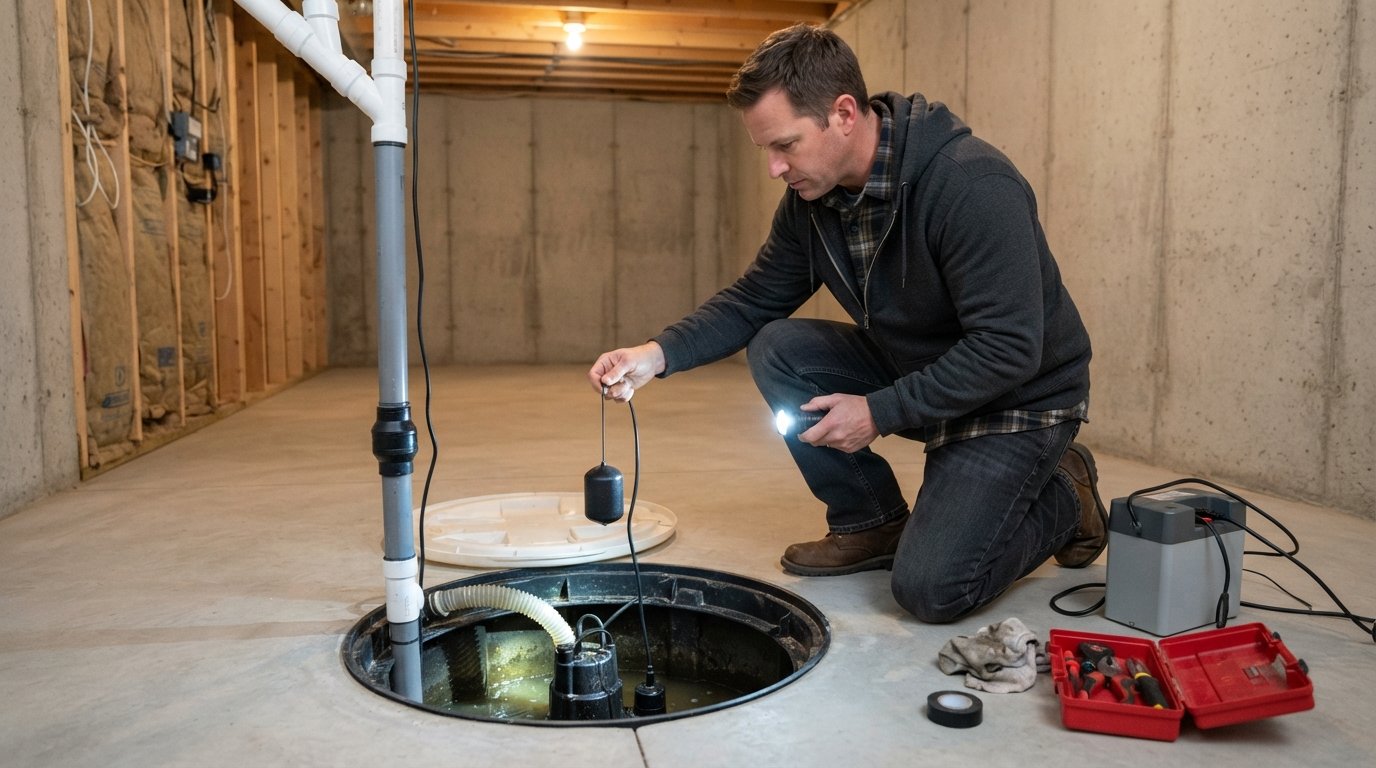
How to Test and Maintain a Sump Pump Before Storm Season
Master how to test and maintain a sump pump before storm season to prevent basement flooding. For expert help, call (833)-700-4293.

By Andrew Shaw
Learn more about Handyman for guides, costs, and what to expect.
Compare Handyman Pros Near You

Enter your ZIP code to compare top-rated local professionals and request free quotes.
When the first major storm of the season rolls in, the last thing you want is a sump pump that sputters, stalls, or stays silent. A failed pump can turn a finished basement into a soggy, expensive mess in minutes. The good news is that a little preventive maintenance now can save you thousands in water damage later. Testing and maintaining your sump pump before storm season is not complicated, but it does require a consistent routine. This guide walks you through the essential steps, from a five-minute manual test to checking backup power options, so you can face heavy rain with confidence.
Why Pre-Storm Sump Pump Maintenance Matters
A sump pump sits idle for months, then suddenly has to handle hundreds of gallons of water during a downpour. That long idle period is exactly when problems develop: debris clogs the intake, the float switch sticks, or the check valve fails. According to insurance industry data, water damage from failed sump pumps is one of the most common and costly homeowner claims. Many of these failures could have been prevented with a simple preseason check.
Beyond avoiding a wet basement, a well-maintained pump protects your home's value and your peace of mind. If you are planning a basement remodel or have already finished the space, the stakes are even higher. Regular maintenance also extends the life of the pump, delaying a replacement that can cost several hundred dollars. Think of it as a small investment of time that pays off in avoided repairs and lower stress.
Homeowners often ask when to start. The ideal time is a few weeks before your region's rainy season, typically early spring or late fall depending on where you live. If you are unsure about local weather patterns, a quick call to a local contractor or a look at historical rainfall data can help you time it right. The key is to be proactive, not reactive.
The Five-Minute Manual Test
Testing your sump pump manually is the fastest way to confirm it will run when needed. You do not need special tools, just a bucket of water and a few minutes. This test checks both the pump motor and the float switch, which is the component that tells the pump to turn on.
Follow these steps for a thorough manual test:
- Locate the sump pit and remove the cover. Set the cover aside carefully. If the pit is full of debris, clear it out before testing.
- Check the power source. Make sure the pump is plugged into a working GFCI outlet. You can test the outlet by plugging in a small appliance or using a circuit tester.
- Pour water into the pit. Slowly pour about five gallons of water into the pit until the float rises. The pump should kick on automatically and start discharging water.
- Listen and observe. The motor should run smoothly without grinding or rattling. Water should flow out of the discharge pipe quickly. If the pump does not start, the float switch may be stuck or faulty.
- Test the float switch manually (if accessible). Some pumps have a float that you can lift by hand. If lifting the float does not activate the pump, the switch needs adjustment or replacement.
If the pump runs but does not move water, the problem could be a clogged impeller or a blocked discharge line. If it does not run at all, check the circuit breaker and the float switch before assuming the motor is dead. Many pumps have a reset button on the motor housing; try pressing it once. If the pump still fails, it may be time for a replacement or a call to a professional.
After testing, let the pump run until the water level drops and the float returns to its resting position. This confirms the off switch works too. A pump that runs continuously or never shuts off has a switch problem that should be addressed immediately.
Inspecting the Check Valve, Discharge Line, and Pit Condition
The pump itself is only part of the system. The check valve, discharge line, and sump pit all play critical roles in moving water away from your foundation. A failure in any of these components can render a perfectly good pump useless.
The check valve prevents water from flowing back into the pit after the pump shuts off. Without it, the pump would cycle repeatedly, burning out the motor. To inspect it, look for a valve installed on the discharge pipe, typically a few feet above the pump. Check for leaks, corrosion, or signs of freezing. If the valve is more than five years old or looks damaged, replace it. It is an inexpensive part that can save your pump.
Next, examine the discharge line. This is the pipe that carries water outside. Look for cracks, loose connections, or blockages. A common mistake is routing the discharge line into a area that slopes back toward the house, which just returns the water to your foundation. Make sure the line discharges at least six feet from the foundation and slopes downward. If you live in a cold climate, ensure the line is not exposed to freezing temperatures, or install a freeze-proof attachment.
The sump pit itself should be clean and free of debris. Dirt, gravel, and small stones can clog the pump intake and cause it to overheat. Scoop out any debris with a small shovel or wet/dry vacuum. While you are in the pit, check for signs of rust or cracks in the liner. A damaged liner can allow groundwater to seep in around the pump, reducing efficiency.
Backup Power and Battery Backup Options
Storms often come with power outages, and a sump pump without power is just a plastic bucket. If your area experiences frequent outages, a backup system is essential. There are two main types: battery backup pumps and standby generators.
A battery backup sump pump is a separate pump that runs on a deep-cycle battery. It sits in the same pit and activates if the main pump fails or the power goes out. These systems are relatively affordable and easy to install. However, the battery needs regular testing and replacement every three to five years. Most units have an alarm or indicator light to show battery status. Test the backup pump monthly by unplugging the main pump and pouring water into the pit. The backup should kick in automatically.
Standby generators are a larger investment but provide whole-house power, keeping your sump pump, refrigerator, and other essentials running during an outage. They run on natural gas or propane and start automatically when the power fails. If you choose this route, have a licensed electrician install a transfer switch to connect the generator to your home's electrical panel. For homeowners who want a simpler solution, a portable generator can power the sump pump, but it requires manual setup and safe operation.
When selecting a backup system, consider the pumping capacity, run time, and maintenance requirements. A backup pump should be able to handle at least the same volume as your primary pump. Also, check the battery type and warranty. Some systems use AGM batteries, which are maintenance-free, while others require periodic water checks.
Common Failure Causes After a Long Idle Season
Sump pumps often fail at the worst possible moment because they sit idle for months. Understanding why failures happen can help you prevent them. Here are the most common culprits:
- Stuck float switch: Debris or rust can cause the float to stick in the off or on position. Regular testing and cleaning prevent this.
- Clogged impeller: Small stones or sediment can jam the impeller, preventing water movement. A pre-season cleaning helps.
- Frozen or blocked discharge line: If water remains in the line over winter, it can freeze and crack the pipe. Ensure the line drains completely after each use.
- Dead battery in backup system: Batteries lose capacity over time, especially if not tested. Replace old batteries proactively.
- Electrical issues: A tripped breaker or faulty GFCI outlet can cut power. Test the outlet and reset the breaker before storm season.
Another common issue is a pump that is simply too small for the job. If your pump runs constantly during moderate rain, it may be undersized. A professional can calculate the correct capacity based on your home's square footage and water table. Upgrading to a higher-capacity pump is a worthwhile investment if you live in a flood-prone area.
When to Call a Plumber vs. Replace the Pump Yourself
Some sump pump tasks are easy DIY projects, while others require professional help. Knowing the difference can save you time, money, and frustration. If you are comfortable with basic plumbing and electrical work, you can handle most maintenance tasks. However, certain situations call for a licensed plumber.
Call a plumber if you notice any of the following: the pump trips the circuit breaker repeatedly, the motor hums but does not pump water, the discharge line is frozen or buried underground, or the pit is not filling with water at all (which could indicate a drainage issue). Also, if you need a new electrical circuit or a backup system hardwired, an electrician or plumber should handle it. DIY electrical work is risky and may violate local codes.
Replacing the pump yourself is feasible if you are handy and the new pump is a direct swap. Turn off the power, disconnect the old pump, and follow the manufacturer's instructions. However, if the discharge line needs modification or the pit is damaged, a professional is your best bet. For homeowners who prefer to delegate, connecting with a pre-vetted plumbing contractor through a trusted directory can simplify the process. Platforms like Homes.Contractors help homeowners find qualified professionals for sump pump maintenance and repair, ensuring the job is done right the first time.
If you are unsure whether to repair or replace, consider the pump's age. Most sump pumps last eight to ten years. If yours is approaching that age and has shown any signs of failure, replacement is often more cost-effective than repeated repairs.
Creating a Seasonal Maintenance Checklist
To make sump pump maintenance a habit, create a checklist and schedule it around your region's storm season. A simple annual routine can prevent most failures. Start with the manual test described earlier, then inspect the check valve and discharge line. Clean the pit and test the backup system. Finally, check the power source and reset any tripped breakers.
Here is a sample checklist you can adapt:
- Test pump and float switch with water.
- Clean debris from the sump pit.
- Inspect check valve for leaks or corrosion.
- Verify discharge line is clear and slopes away from the house.
- Test backup pump and battery.
- Check GFCI outlet and circuit breaker.
- Listen for unusual noises during operation.
Perform this checklist at least once a year, ideally a month before storm season. If you live in an area with year-round rain, consider testing every six months. Keep a log of maintenance dates and any issues you notice. This record helps you track the pump's performance and decide when to replace it.
For homeowners who want extra assurance, many plumbing contractors offer preseason maintenance packages. These packages typically include a full inspection, cleaning, and testing of the pump and backup system. It is a convenient way to ensure everything is in order without lifting a finger. You can request free estimates from local professionals to compare prices and services.
Final Thoughts
Testing and maintaining your sump pump before storm season is a straightforward task that delivers outsized returns. By investing an hour or two each year, you can avoid the expense and stress of a flooded basement. Remember to test the pump manually, inspect the check valve and discharge line, consider a backup power source, and know when to call a pro. With a little preparation, you can face the next downpour with confidence, knowing your home is protected.
Learn more about Handyman for guides, costs, and what to expect.
Compare Handyman Pros Near You
Enter your ZIP code to compare top-rated local professionals and request free quotes.