
Attic Insulation Types and R-Value Explained for Homeowners
Compare attic insulation types and R-value targets to cut energy bills. Call (833)-700-4293 for vetted local contractor referrals.

By Victor Lawson
Learn more about General Contracting for guides, costs, and what to expect.
Compare General Contracting Pros Near You

Enter your ZIP code to compare top-rated local professionals and request free quotes.
A cold draft in January or a sweltering second floor in July often points to one hidden culprit: under-insulated attic space. According to the U.S. Department of Energy, heating and cooling account for roughly half of a typical home's energy use, and an under-insulated attic can waste a significant portion of that money. The challenge is that no single insulation product fits every home, and the numbers on the packaging can feel like a foreign language. This guide breaks down the types of attic insulation and R-value explained in plain terms, so you can compare options, understand climate-specific targets, and plan an upgrade that actually pays you back.
Attic Insulation Types and R-Value Explained: The Basics
Before comparing materials, it helps to understand what R-value actually measures. R-value is thermal resistance: the higher the number, the better the material slows heat transfer. A common mistake is assuming that a high R-value alone guarantees performance. In reality, R-value only works when the insulation is installed at the correct density and depth, without gaps, compressions, or air leaks that let heat bypass the material entirely. Air sealing and insulation are partners, not substitutes.
Attic insulation generally falls into two families: loose-fill and blanket (batt) products, which are porous and rely on trapped air pockets, and rigid or spray foam products, which use cellular structures or air barriers. Each type has a different installed R-value per inch, which determines how much depth you need to hit your climate zone target. The table below gives typical installed values, though manufacturer specs vary, so always check the product label.
- Fiberglass batts: roughly R-2.9 to R-3.8 per inch, inexpensive and widely available
- Blown-in fiberglass: about R-2.2 to R-3.0 per inch, good for filling irregular joist bays
- Blown-in cellulose: R-3.2 to R-3.8 per inch, dense and effective at blocking airflow
- Open-cell spray foam: R-3.5 to R-3.8 per inch, expands to seal gaps
- Closed-cell spray foam: R-6.0 to R-7.0 per inch, highest R-value per inch plus a vapor barrier
- Rigid foam board: R-5 to R-6.5 per inch, useful for cathedral ceilings and rafter runs
These per-inch figures matter because attic depth is often limited. In a home with 2x6 ceiling joists, you have about 5.5 inches of cavity depth, which caps how much batts or loose fill you can add before you need to build up the framing. Spray foam and rigid board solve that depth problem at a premium price. The right choice depends on your attic configuration, climate zone, and budget, which is why a whole-home assessment is more valuable than picking the product with the highest R-value on the shelf.
Comparing the Main Attic Insulation Materials
Homeowners deciding between materials usually weigh four factors: installed cost, ease of retrofit, performance in humid or cold climates, and air-sealing ability. Blown-in products are the most common retrofit solution because they can be installed quickly over existing insulation and fill odd-shaped spaces around pipes and wiring. Spray foam is the most effective at sealing, but it requires specialized equipment and a trained applicator, and some formulations need curing time before the space is safe to occupy.
Here is a practical comparison of the four main options for an attic upgrade.
- Blown-in fiberglass or cellulose: Best value for flat attic floors. Cellulose is denser and better at resisting air movement, while fiberglass is lighter and less prone to settling. Both are DIY-friendly for small jobs, but professional installation with a blower gives more consistent density.
- Fiberglass batts: Best for standard joist spacing and accessible attics. They are inexpensive and easy to cut, but they must be installed with no gaps or compression. Batts underperform when they are crammed around obstructions.
- Spray foam (open or closed cell): Best for sealing complex attics and cathedral ceilings. Closed-cell foam adds structural rigidity and a vapor barrier, but it costs the most and must be installed by a professional. Open-cell foam is softer and less expensive but has a lower R-value per inch.
- Rigid foam board: Best for rafters and kneewalls where you need high R-value in a thin profile. It is also useful for covering thermal bridging on wood framing, but it must be carefully sealed at the edges to be effective.
In practice, many attic upgrades combine materials: for example, blown-in cellulose across the attic floor plus rigid foam board on kneewalls and hatch covers. A qualified contractor can model the assembly so the R-value is continuous and the air barrier is complete. If you are also planning window upgrades as part of a broader efficiency push, our guide to window replacement types and energy savings explains how to sequence projects for the best return.
Recommended R-Values by Climate Zone and Attic Configuration
The U.S. Department of Energy maps the country into climate zones, and the recommended attic R-value rises as winters get colder. For an uninsulated attic floor, current guidance generally ranges from R-30 in the warmest zones to R-60 in the coldest. For a vented attic, the insulation goes on the floor (the ceiling line of the living space). For an unvented or cathedral ceiling attic, insulation goes at the roof deck, and the target R-value is usually higher per inch because there is less space to work with.
Typical targets look like this:
- Zones 1 to 3 (hot and mixed climates): R-30 to R-49 for a vented attic floor
- Zone 4 (mixed): R-49 to R-60
- Zones 5 to 8 (cold climates): R-49 to R-60, with R-60 often recommended for new construction
- Unvented attic or cathedral ceiling: R-30 to R-49 at the roof deck, depending on zone and assembly
These are starting points, not permits. The right target also depends on how your attic is vented, whether ductwork runs through it, and how much depth your framing allows. A common scenario is a 1970s ranch with 4 inches of old fiberglass between the joists, delivering maybe R-11. To reach R-49 with blown-in cellulose, you would need roughly 13 inches of depth, which may require installing baffles at the eaves and building up the attic floor with an additional layer of framing. That kind of scope is exactly what a pre-vetted insulation contractor should assess before quoting.
Air sealing is where many upgrades fall short. Before adding insulation, a contractor should seal penetrations around wiring, plumbing stacks, recessed lights, and the attic hatch, because a continuous air barrier is what keeps warm moist air from bypassing the insulation and condensing on cold roof sheathing. If you are unsure how to vet bids for this work, resources like Homes.Contractors offer directories and educational guidance on selecting qualified trades, which helps you compare proposals on scope rather than price alone.
How to Spot Under-Insulation and Air Leaks Before You Upgrade
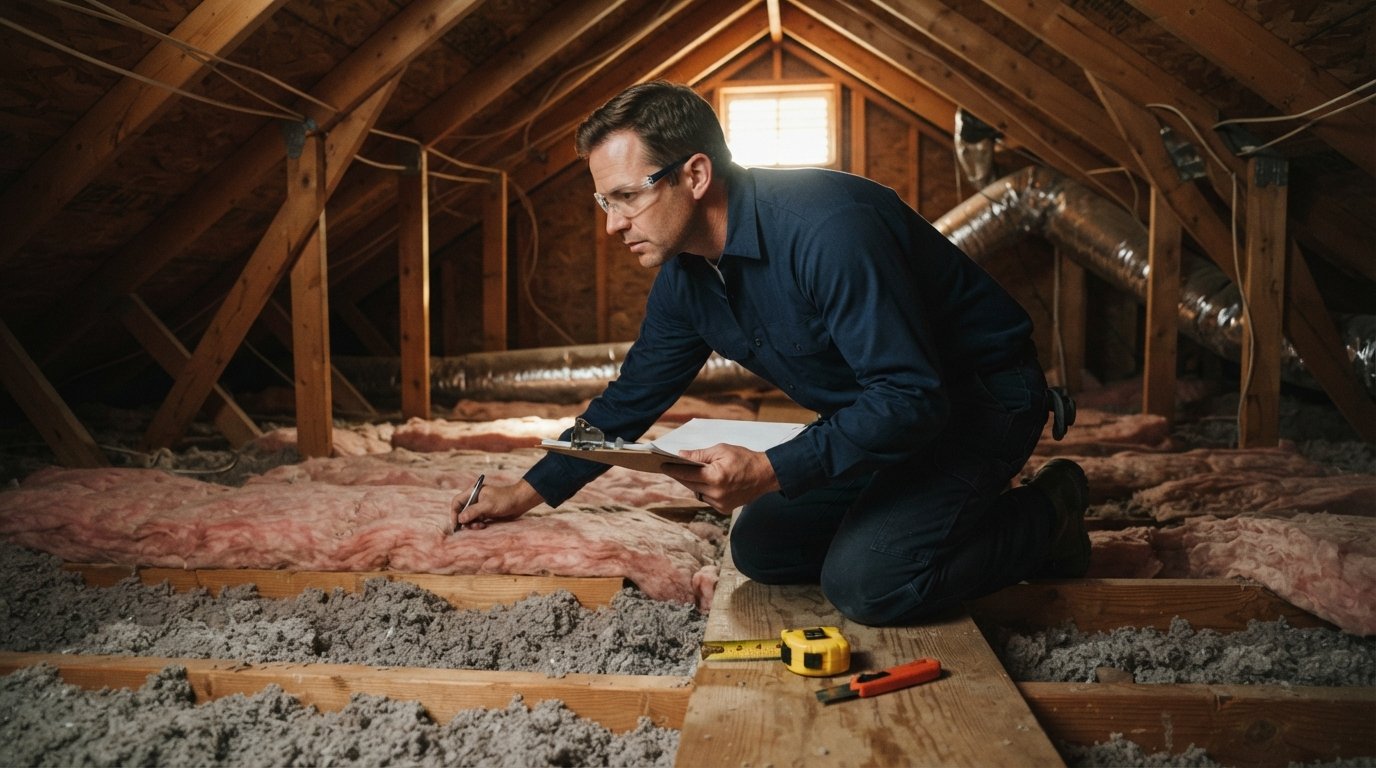
Most homeowners discover an insulation problem through symptoms: rooms above the garage never get warm, the upstairs is unbearably hot in summer, or energy bills spike without a change in habits. A visual inspection can confirm suspicions. If you can see the ceiling joists when you look across the attic floor, the insulation is likely below current recommendations, since modern standards usually bury the joists. Compressed, dirty, or patchy insulation is another warning sign, as is insulation that has pulled away from the eaves or around chimneys.
Air leaks are harder to see. Common culprits include:
- Recessed can lights that are not rated for insulation contact
- Gaps around plumbing and electrical penetrations
- An unsealed or uninsulated attic hatch
- Kneewall doors and drop-down stair assemblies
- Top plates where wall framing meets the attic floor
A simple pressurization test (often called a blower door test) can quantify how leaky the house is and help prioritize sealing work. Many insulation contractors include this diagnostic in their assessment. If you want to spot-check before calling anyone, wait for a windy day and feel for drafts around the attic hatch, or look for dirty insulation marks that indicate air movement. Once leaks are sealed, adding insulation delivers its full rated performance instead of a fraction of it.
Typical Costs and Expected Energy Bill Impact
Attic insulation is one of the few home improvements with a measurable payback. Installed costs vary widely by region, material, and attic complexity, but broad ranges help set expectations. Blown-in fiberglass or cellulose typically runs from about $1.50 to $3.50 per square foot installed, while spray foam can range from $3.00 to $7.00 per square foot or more depending on thickness and foam type. Rigid board and batts fall in between, and a small attic with easy access may cost $1,500 to $3,000 total, while a large or complicated attic can exceed $6,000.
Energy savings depend on where you start. A home with almost no attic insulation might cut heating and cooling costs by 10 to 20 percent after a full upgrade, while a home that is already partially insulated may see smaller but still meaningful savings. The DOE estimates that air sealing and insulating an attic can save homeowners an average of around 10 percent on total energy bills, with larger savings in older homes. Rebates and federal tax credits can improve the math further, so ask contractors about available incentives before signing.
The most reliable way to get a realistic number is to request multiple itemized quotes that separate air sealing, insulation material, and any framing or baffle work. That transparency makes it easier to compare bids and avoid surprise charges. PlanRemodel's directory connects homeowners with pre-vetted local contractors who can assess your attic and provide free estimates, so you can compare scope and cost side by side. Before work begins, confirm the contractor's license, insurance, and warranty terms, and ask how they will verify the installed R-value once the job is complete.
Understanding the types of attic insulation and R-value explained above turns a confusing purchase into a manageable project. Start with an inspection, seal the air leaks, choose a material that fits your attic's depth and climate, and target the recommended R-value for your zone. With the right scope and a qualified installer, a well-insulated attic is one of the most cost-effective upgrades a homeowner can make, delivering comfort in every season and lower bills year after year.