
How to Plan Smart Home Integration During a Remodel
Plan smart home integration during a remodel with pre-wiring, budgets, and trade sequencing that add resale value. Call (833)-700-4293 for vetted pros.

By Benjamin Adler
Learn more about Bathroom Remodel for guides, costs, and what to expect.
Compare Bathroom Remodel Pros Near You

Enter your ZIP code to compare top-rated local professionals and request free quotes.
A remodel is the single best opportunity you will ever have to wire your home for the future. Walls are open, ceilings are exposed, and electricians are already on site, which means the incremental cost of adding smart home infrastructure now is a fraction of what it costs to retrofit later. Yet most homeowners treat smart devices as an afterthought, buying hubs and plugs after the drywall goes up and then discovering that the wiring they need does not exist. This guide walks through how to plan smart home integration during a remodel so your project delivers reliable automation, lower energy bills, and stronger resale value instead of a patchwork of apps and adapters.
Start With the Infrastructure, Not the Gadgets
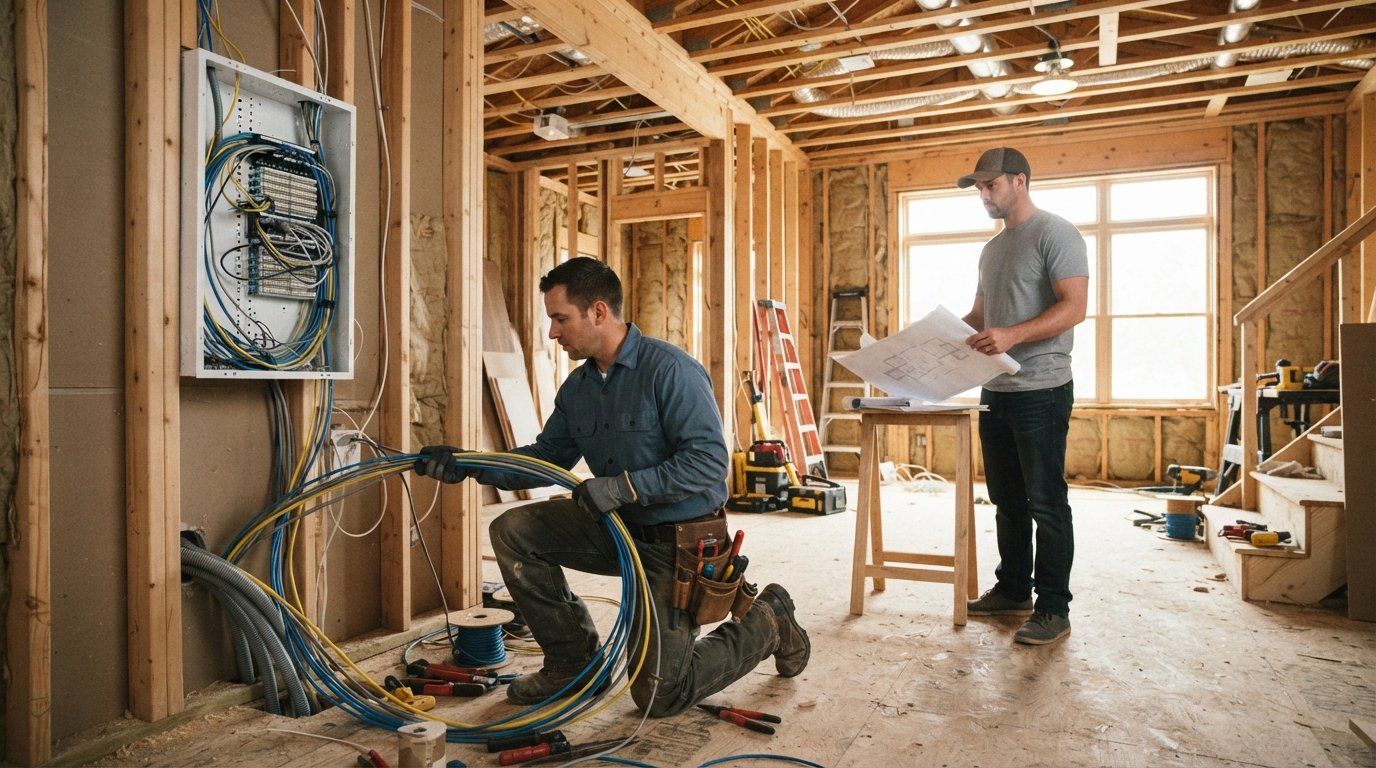
Smart home technology changes every few years, but the wiring behind your walls will stay there for decades. That is why the first planning conversation should focus on pathways, power, and network cabling rather than specific brands or devices. A dedicated neutral wire in every switch box, a structured media enclosure for networking gear, and conduit runs from the utility room to key rooms give you options that survive whatever protocol wins next. If you skip this step, you will eventually be limited to battery-powered devices or surface-mounted cable runs that undercut the clean look you paid for.
Walk your plans room by room with your electrician and identify every location where a device might live: switch plates, ceiling fixtures, door frames, window casings, and the corners where security cameras would have the best sightlines. Ask for deep electrical boxes (2.5 inches or more) so smart switches with larger bodies fit without crowding. Request a dedicated 20-amp circuit for the network enclosure and any media closet. These small line items add hundreds of dollars, not thousands, when they happen during rough-in, and they prevent the most common smart home retrofit headaches.
Network cabling deserves equal attention. Wi-Fi alone struggles once you have dozens of connected devices, thick walls, and a two-story layout. Running Cat6 or Cat6a cable to ceiling access points, televisions, and camera locations creates a wired backbone that makes everything else more reliable. The cost is modest during a remodel, and the payoff is a network that supports video doorbells, streaming, and automation without dropouts.
Pre-Wiring Decisions for Lighting, Thermostats, and Security
Lighting is where smart home planning pays off most visibly. Decide early whether you want smart switches (which keep standard bulbs and familiar wall controls) or smart bulbs (which offer color and tunability but require constant power). Smart switches almost always win for whole-home automation because guests and family members can still use the wall plate normally. For each switch location, specify a neutral wire, and consider adding a few three-way and four-way circuits for hallways and stairwells where motion-activated lighting adds real convenience.
Thermostats need a C-wire, the common wire that powers smart models without battery tricks. Many older homes lack one, and adding it during a remodel is trivial while walls are open. If you are replacing HVAC equipment at the same time, ask the contractor to confirm compatibility with the thermostat platform you prefer. Zoning dampers and multiple thermostats are also far easier to wire now than later, especially in two-story homes with rooms that heat unevenly.
Security pre-wiring follows the same logic. Choose camera locations at rough-in, run Cat6 or siamese cable to each, and power them from a central location with battery backup. Pre-wire door and window sensors on the frames rather than relying on adhesive mounts that fall off in humid weather. For a deeper look at the line items that surprise homeowners mid-project, see our guide to hidden costs that blow up a home remodel budget, which covers the change-order traps that smart home additions can trigger if they are not in the original scope.
Smart Upgrades That Pair Naturally With Kitchen and Bathroom Remodels
Kitchens and bathrooms are the highest-value rooms in most remodels, and they are also where smart integration delivers the most everyday utility. In the kitchen, plan for under-cabinet lighting on a dimmable smart circuit, a dedicated outlet inside a pantry or cabinet for a hub or speaker, and a smart leak detector under the sink and behind the refrigerator. If you are replacing appliances, check whether the models you want support open standards or at least reliable app control; appliance connectivity is still uneven, so treat it as a bonus rather than a cornerstone of your plan.
Bathrooms benefit from smart ventilation most of all. A humidity-sensing exhaust fan that runs automatically prevents mold and moisture damage, and wiring it to a smart switch with a timer adds convenience. Heated floors, towel warmers, and mirror lighting all need dedicated circuits, so decide now rather than wishing later. Leak detection near the toilet, tub, and water heater is inexpensive insurance, and shutoff valves that close automatically can prevent catastrophic water damage while you are away.
Whole-home considerations belong in the same conversation. If you are updating your HVAC system as part of the project, plan for smart vents or zone control, and confirm that your electrical panel has spare capacity for added circuits. Homeowners planning larger upgrades should review our directory of pre-vetted home improvement contractors to compare specialists who understand integrated systems rather than treating each trade in isolation.
Coordinating Smart Home Trades With the General Contractor's Schedule
Smart home work fails most often because it is sequenced wrong. Low-voltage cabling has to go in after framing and before insulation, smart switch boxes need to be set during electrical rough-in, and device installation happens after paint but before final clean-up. If your low-voltage technician arrives after drywall, you are paying for drywall repair. Put the smart home scope in the main construction schedule with explicit milestones, and name one person (you or your integrator) who signs off at each stage.
Use a simple sequence to keep everyone aligned:
- Design phase: finalize device locations, network plan, and power requirements before permits are filed.
- Rough-in: run structured cabling, set deep boxes, add neutrals and dedicated circuits, and photograph every wall before insulation.
- Trim-out: install switches, outlets, access points, and camera mounts after paint.
- Commissioning: configure the network, pair devices, test automation scenes, and document everything before final payment.
Communication matters as much as sequencing. Give your general contractor a one-page smart home scope that lists every trade's responsibilities, including who supplies devices and who configures them. Ask the electrician and low-voltage installer to work the same week so any conflicts surface immediately. Photograph open walls with a tape measure in frame; those photos will save hours when you mount a television or hang cabinets later. If you are hiring separate specialists, verify licensing and insurance the same way you would for any trade, and get the smart home scope in writing so it does not become an unofficial favor.
Budget Ranges and Which Integrations Pay Back at Resale
Smart home costs vary widely by ambition, but rough ranges help you plan. A basic package of smart switches, a thermostat, a video doorbell, and a few leak sensors typically runs $1,500 to $4,000 installed during a remodel, since labor is shared with other electrical work. A mid-range plan with structured cabling, access points, motorized shades in key rooms, and a security system with pre-wired cameras lands around $5,000 to $12,000. Whole-home integration with lighting control, audio, and dedicated rack equipment can exceed $20,000, and at that level a professional integrator is worth the fee.
Resale payback is strongest for the unglamorous stuff. Buyers value reliable networking, smart thermostats, video doorbells, and leak detection because they lower bills and reduce risk. Motorized shades and whole-home audio impress during showings but rarely return their cost. The safest strategy is to invest in infrastructure (cabling, neutrals, conduit, panel capacity) and add devices incrementally, because infrastructure holds value while gadgets date quickly. Energy-efficient smart thermostats and lighting controls also support utility rebates in many states, which improves the math further.
Budget a contingency of 10 to 15 percent for smart home scope, and decide in advance which items you would cut if costs rise. Document every device, network password, and configuration in a handover binder; future buyers and future you will thank you. When you are ready to compare bids, gather at least three quotes for the electrical and low-voltage work, and confirm that each contractor itemizes smart home prep separately so you can see exactly what you are paying for.
Planning smart home integration during a remodel is really a exercise in sequencing and restraint: wire generously, choose standards-based devices, and phase your purchases so the house grows with your needs. Get the infrastructure right while the walls are open, coordinate the trades on one schedule, and the technology will be the easy part.