
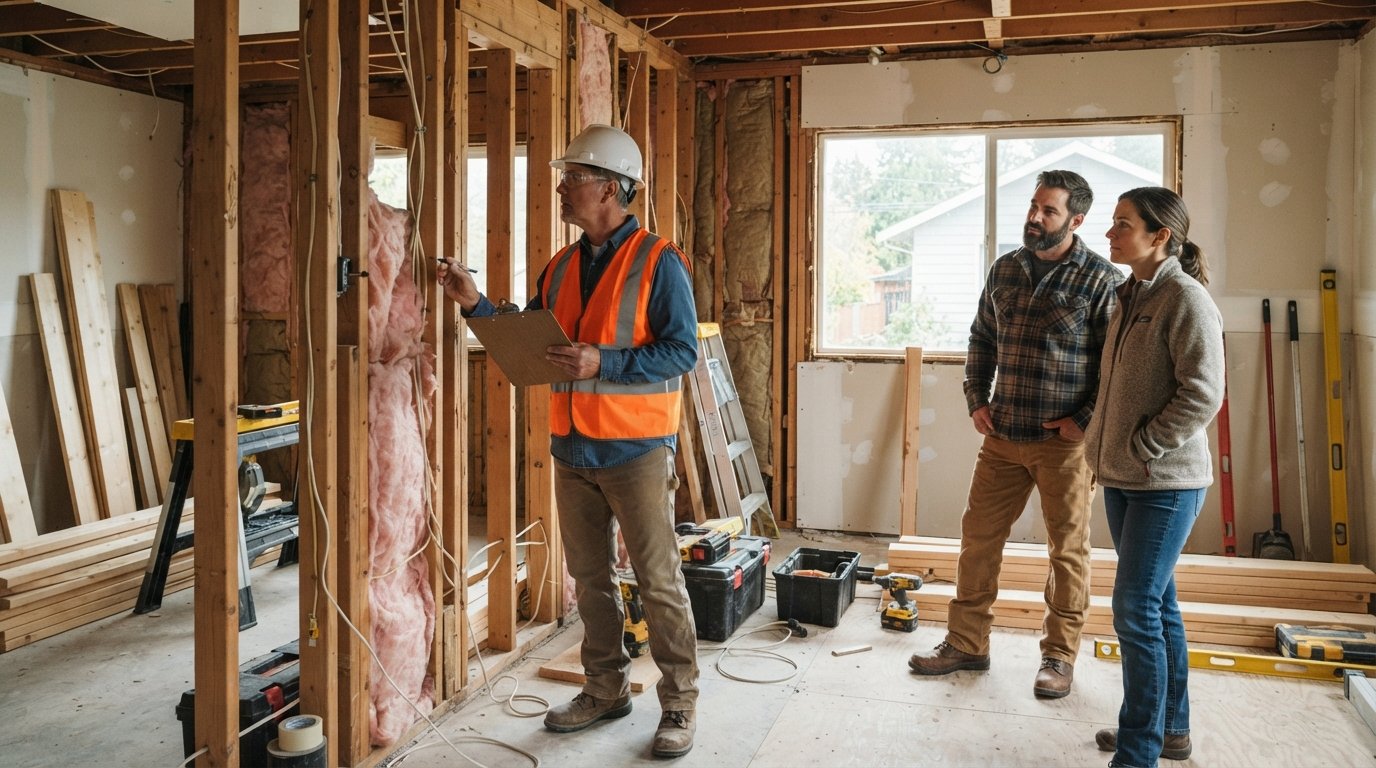
What to Expect During a Home Renovation Inspection
Understand what to expect during a home renovation inspection, from rough-in checks to final sign-off. Call (833)-700-4293 to compare vetted contractors.

By Valerie Reed
Learn more about General Contracting for guides, costs, and what to expect.
Compare General Contracting Pros Near You

Enter your ZIP code to compare top-rated local professionals and request free quotes.
Your contractor just handed you a schedule that includes a visit from the city building inspector, and you are not sure what that means for your project timeline or your budget. You are not alone. For many homeowners, the inspection process feels like an unknown checkpoint that can stall progress or trigger unexpected costs. The reality is that inspections are a built-in quality control step, and understanding them turns anxiety into confidence. This article walks you through what to expect during a home renovation inspection, from the moment your contractor schedules the visit to the final sign-off that closes your permit. You will learn which projects trigger inspections, who meets the inspector on site, why some inspections fail, and how to keep records that protect you long after the last nail is driven.
Why Renovation Inspections Happen and What They Cover
Building inspections exist to verify that work meets local safety codes, not to grade your design choices. When you pull a permit for a renovation, the permit itself defines a series of inspection milestones that must be completed before the project can move forward or be legally occupied. The inspector is a municipal or county employee who checks specific elements of the work against the adopted building code, and their approval is required to release the next phase of construction. This is why a failed inspection can pause a project: the contractor cannot legally cover framing with drywall until the framing inspection passes.
What the inspector actually examines depends on the scope of your renovation. A bathroom remodel might involve plumbing rough-in, electrical rough-in, and a final inspection. A kitchen remodel often adds mechanical (HVAC) and gas line inspections. Structural changes, such as removing a load-bearing wall, require a framing inspection and sometimes an engineered design review. The inspection is not a home inspection in the real estate sense; it is a code compliance check focused on the work covered by your permit. Understanding this distinction helps you set realistic expectations and avoid treating the inspector as an adversary.
Inspections also protect you financially. If a contractor skips a required inspection and the work is later found to be non-compliant, you may face fines, forced removal of finished surfaces, or difficulty selling your home because the permit was never closed. A clean inspection record is proof that the work was done to code, which matters for resale, insurance claims, and future renovations. For homeowners who are planning a complex project, working with a pre-vetted contractor who understands the local inspection schedule is a major advantage. You can compare qualified local contractors through Homes.Contractors to find professionals who routinely manage permits and inspections in your area.
Which Renovation Projects Trigger Rough-In and Final Inspections
Not every cosmetic upgrade requires a permit or an inspection. Painting, replacing a faucet, or installing new flooring over an existing subfloor typically falls outside the permit scope. However, any work that touches the structural, electrical, plumbing, or mechanical systems of your home almost always requires a permit and at least one inspection. The specific inspections are usually divided into two broad categories: rough-in inspections, which happen before walls are closed up, and final inspections, which happen after all work is complete.
Rough-in inspections verify the parts of the system that will be hidden once construction advances. For example, plumbing rough-in confirms that drain slopes, venting, and supply line materials meet code before the drywall goes up. Electrical rough-in checks box placement, wire gauge, grounding, and protection plates. HVAC rough-in verifies duct sizing, refrigerant lines, and equipment clearances. If your project includes framing changes, a framing inspection checks stud spacing, headers, and shear bracing before insulation and drywall are installed. These inspections are time-sensitive: if the contractor misses the rough-in window, they may need to open finished walls later, which adds cost and delay.
Final inspections occur after the work is complete and the systems are operational. The inspector verifies that fixtures are installed, outlets and switches work, the HVAC system runs, and the work matches the approved plans. Some jurisdictions also require a separate insulation inspection, a fire-rated assembly inspection, or a post-construction energy compliance check. Here is a quick reference for common project types and the inspections they typically trigger:
- Bathroom remodel: Plumbing rough-in, electrical rough-in, and final inspection; some areas add a waterproofing inspection before tile.
- Kitchen remodel: Electrical rough-in, plumbing rough-in, mechanical (range hood venting), and final inspection; gas line pressure test if appliances are added.
- Basement finish: Framing, electrical rough-in, plumbing rough-in (if adding a bath), insulation, and final inspection.
- Room addition or structural wall removal: Foundation, framing, electrical, plumbing, mechanical, insulation, and final inspections, often with structural engineering sign-off.
- Deck build: Footing or pier inspection, framing inspection, and final inspection, with ledger flashing details reviewed at framing.
Your contractor should provide a permit and inspection schedule before demolition begins. If they cannot explain which inspections apply to your project, that is a red flag. A professional contractor will know the local jurisdiction's requirements and will build inspection waits into the project timeline. For a deeper look at keeping a renovation on schedule, see our guide on how to manage a home renovation timeline and delays, which explains how inspection holds affect the critical path.
How Your Contractor Schedules Inspections and Who Meets the Inspector
In most jurisdictions, the contractor or the homeowner can request an inspection, but the responsibility usually falls on the permit holder. If your contractor pulled the permit, they are typically the permit holder and the point of contact for scheduling. The process usually works like this: the contractor calls or uses an online portal to request an inspection, the jurisdiction assigns a date or a window (often a half-day or full-day window), and the contractor coordinates the site so the work is ready and accessible. Some cities offer same-day or next-day inspections, while others are booked several days out. In busy seasons, inspection delays can add a week or more to your timeline.
Who meets the inspector on site matters. The general contractor or the relevant trade subcontractor (plumber, electrician, HVAC technician) should be present to answer technical questions and correct minor issues on the spot. You, as the homeowner, do not need to be home for every inspection, but you should know when they are happening and what the outcome is. If your contractor asks you to be present, clarify why: sometimes it is to provide access, and sometimes it is to discuss a code issue that requires a homeowner decision. Never let a contractor tell you that you are not allowed to attend an inspection; you have the right to be on your own property, and many homeowners find it educational to observe.
The inspection itself is usually a focused visit. The inspector reviews the permitted work, checks for code compliance, and either approves the inspection, approves with conditions, or fails it with a written correction notice. The contractor should receive a report or a signed inspection card that documents the result. Ask your contractor to share the inspection results with you the same day. If the inspection passes, the project can proceed to the next phase. If it fails, the correction notice will list specific items that must be fixed before a re-inspection. Understanding this rhythm helps you plan around inspection days and avoid scheduling other trades when the site needs to be clear for the inspector.
Common Reasons an Inspection Fails and How Fixes Are Handled
An inspection failure is not a disaster, but it is a signal that something in the work did not meet code or was not ready for review. The most common reasons for a failed rough-in inspection include incomplete work (the contractor called for inspection too early), missing or incorrect protection plates on wiring, improper drain slope or venting on plumbing, inadequate framing headers, and missing fire-blocking or draft-stopping. Final inspections often fail because fixtures are not fully installed, outlets or switches are not operational, or the work does not match the approved plans. Sometimes the issue is simply access: the inspector cannot see the work because stored materials or debris block the area.
When an inspection fails, the contractor receives a correction notice and is responsible for fixing the listed items. The contractor then schedules a re-inspection, which may or may not carry an additional fee depending on the jurisdiction. Re-inspection fees are often passed to the contractor if the failure was due to their work quality, but some contracts specify that the homeowner pays for re-inspection fees. Read your contract carefully before work begins so you know who bears that cost. The timeline impact is usually a few days to a week, but it can be longer if the fix requires ordering materials or opening finished surfaces.
How your contractor handles a failed inspection tells you a lot about their professionalism. A good contractor will review the correction notice with you, explain what went wrong, describe the fix, and give you a revised schedule. A contractor who blames the inspector or pressures you to skip the re-inspection is a liability. You should never allow work to proceed past a failed inspection without the correction being made and re-inspected, because covering non-compliant work can void your permit and create safety hazards. If you are concerned about contractor accountability, a directory of pre-vetted professionals can help you find contractors with a track record of clean inspections and transparent communication.
What Homeowners Should Keep in Their Permit and Inspection Records
Your permit and inspection records are more than paperwork; they are the legal history of your renovation. Keep a dedicated folder (digital or physical) that includes the permit application, the approved plans, all inspection reports and signed inspection cards, correction notices and re-inspection results, and the final certificate of occupancy or completion. These documents prove that the work was inspected and approved, which is essential when you sell your home, file an insurance claim, or apply for a future permit. Many jurisdictions also require you to disclose permitted work in a seller's disclosure, and missing records can complicate a sale.
In addition to official records, keep a simple log of inspection dates, the name of the inspector, and any verbal guidance the inspector gave on site. This log can help you resolve disputes and plan future projects. If you are planning a multi-phase renovation, your records also help the next contractor understand what has already been approved. Homeowners who maintain organized records often find that future permits move faster because the jurisdiction can see a history of compliant work.
Finally, do not rely on your contractor to keep these records for you. Contractors move on to other jobs, and digital files can be lost. Request copies of every inspection report as soon as it is issued, and store them with your home documents. If you ever need to prove that a renovation was done to code, those records will be your best evidence. For homeowners who want to compare contractors who understand the importance of documentation and inspection compliance, PlanRemodel's directory of pre-vetted local contractors is a practical starting point.
Understanding what to expect during a home renovation inspection turns a vague worry into a manageable checklist. You now know that inspections are milestone-based, that rough-in inspections happen before walls close, that your contractor is responsible for scheduling and corrections, and that your records are your proof of compliance. The next time your contractor mentions an inspection window, you can ask the right questions, plan around the timeline, and feel confident that the work on your home is being verified to code. If you are still selecting a contractor, start by requesting multiple quotes from pre-vetted professionals who can explain their inspection process before you sign a contract.