
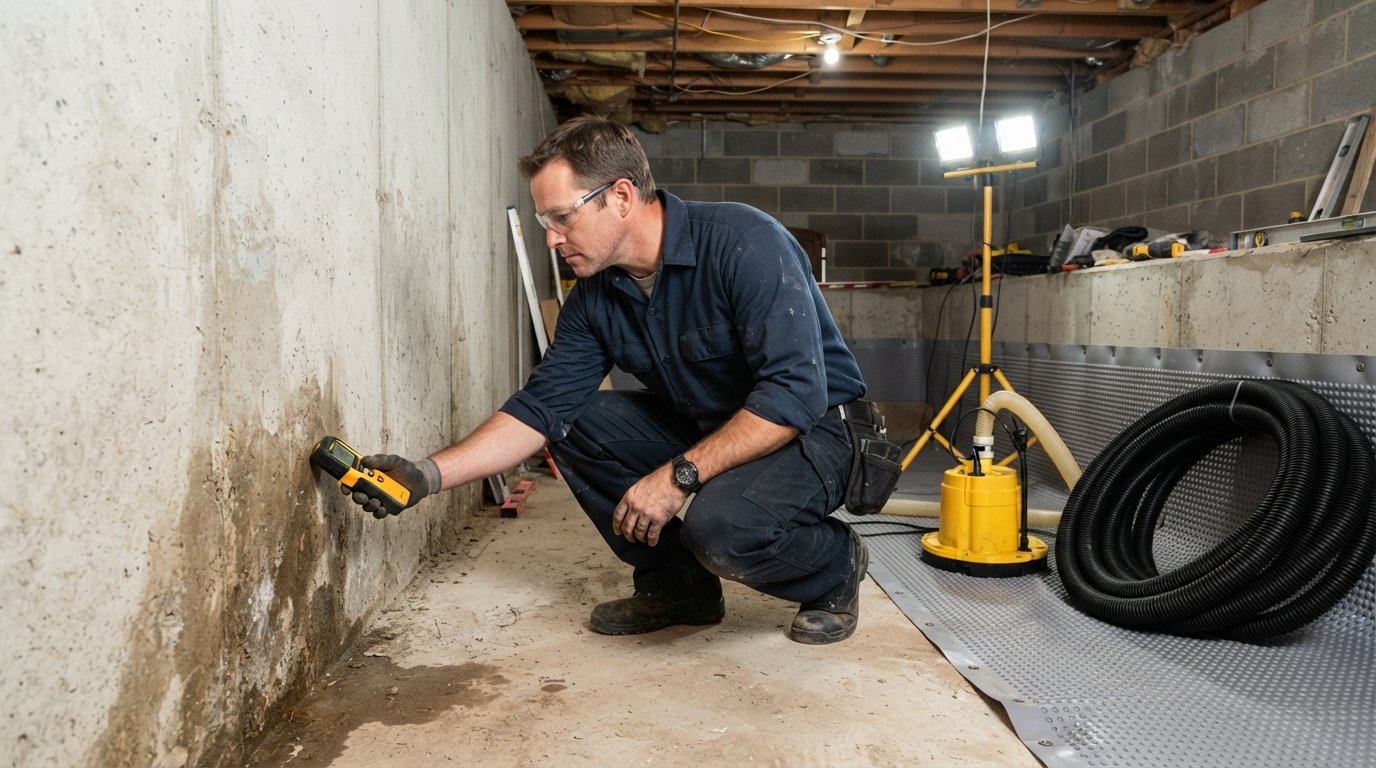
How to Waterproof a Basement Before Finishing It
Learn how to waterproof a basement before finishing it to avoid costly water damage. Call (833)-700-4293 for expert contractor referrals.

By Wendy Turner
Learn more about Roof Repair or Maintenance for guides, costs, and what to expect.
Compare Roof Repair or Maintenance Pros Near You

Enter your ZIP code to compare top-rated local professionals and request free quotes.
You have big plans for that basement: a home theater, a guest suite, a playroom. But before you hang a single piece of drywall, you need to answer one critical question: will it stay dry? Waterproofing a basement before finishing it is not just a good idea; it is the difference between a remodel that adds value and a mold farm that drains your wallet. Moisture problems are the number one reason finished basements fail, and fixing them after the fact can cost several times more than doing it right upfront. This guide walks you through the entire process, from diagnosing the source of the water to passing the final inspection, so you can finish your basement with confidence.
Why Waterproofing Before Finishing Is Non-Negotiable
Finishing a basement without addressing moisture is like painting over rust. The problems will not go away; they will just hide behind your new walls until they become catastrophic. Basements are inherently damp because they sit below grade, surrounded by soil that holds water like a sponge. Even if you have never seen standing water, vapor migration and high humidity can rot framing, warp drywall, and fuel mold growth within months of closing up the walls.
The financial stakes are high. According to industry data, basement waterproofing typically costs between $3,000 and $10,000, while remediating a finished basement with water damage can easily exceed $20,000 once you factor in demolition, mold remediation, and reconstruction. More importantly, your finished basement is an investment in your home's livability and resale value. A dry basement adds usable square footage; a wet one becomes a liability that must be disclosed to buyers.
Waterproofing before finishing also simplifies the process. When the walls are open, you have full access to address cracks, install drainage, and apply coatings. Once the space is finished, any moisture issue requires tearing out drywall and starting over. The sequence matters: waterproof first, test thoroughly, then finish. Skipping or rushing the waterproofing phase is the most common and costly mistake homeowners make.
Diagnose the Water Source Before You Do Anything
You cannot fix a problem you do not understand. Before you buy a single tube of sealant, take time to identify where the moisture is coming from. Water in a basement typically originates from one or more of four sources: surface water from poor grading, roof water from clogged or short gutters, groundwater pressure from the soil, or interior moisture from vapor migration and humidity. Each source requires a different solution, and applying the wrong fix can waste thousands of dollars.
Start with a visual inspection during and after a heavy rain. Look for water stains on the walls, efflorescence (the white, chalky mineral deposits that indicate water movement), and damp spots on the floor. Check the exterior: does the ground slope toward the foundation? Are downspouts discharging within a few feet of the house? These simple issues are often the culprit and the easiest to fix. If the walls are dry but the air feels clammy, you may be dealing with vapor migration rather than liquid water.
For a more scientific approach, tape a 12-inch square of aluminum foil to the basement floor and another to a wall, sealing all edges. Leave them for 24 to 48 hours. If moisture appears on the outside of the foil (the side facing the room), the problem is condensation from humid air. If moisture appears on the inside (the side facing the concrete), water is wicking through the concrete. This simple test tells you whether you need to focus on vapor control or liquid water management.
Exterior Waterproofing: The First Line of Defense
The most effective way to keep a basement dry is to stop water before it reaches the foundation. Exterior waterproofing involves excavating around the foundation, applying a waterproof membrane or coating to the exterior walls, and installing a drainage system to carry water away. This is the gold standard because it addresses the problem at its source, but it is also the most expensive option, often costing $10,000 to $15,000 or more depending on the size of the home and the accessibility of the foundation.
For many homeowners, however, exterior waterproofing is overkill if the issue is simply poor grading or gutter problems. Before committing to excavation, address the low-hanging fruit. Ensure the ground slopes away from the foundation at a rate of at least 6 inches over the first 10 feet. Extend downspouts to discharge at least 6 to 10 feet from the house. Clean gutters regularly. These simple landscaping fixes can solve a surprising number of basement moisture problems for a few hundred dollars.
If you do opt for exterior waterproofing, insist on a professional assessment. A qualified contractor can determine whether a simple membrane is sufficient or whether you need a more robust drainage board and footing drain. This is not a DIY project for most homeowners, given the excavation and structural risks involved. When interviewing contractors, ask for proof of insurance, references from similar projects, and a detailed written scope of work.
Interior Drainage and Sump Pumps: Managing Water That Gets In
If water is already entering the basement, or if exterior waterproofing is impractical, interior drainage systems are the next best line of defense. These systems intercept water at the perimeter of the basement floor and channel it to a sump pump, which discharges it away from the house. Interior waterproofing typically costs $3,000 to $7,000 and is less disruptive than exterior excavation.
The most common interior system is a subfloor drainage channel, often called a French drain, installed along the inside perimeter of the footing. Water that seeps through the walls or floor flows into the channel and gravity-feeds to the sump pit. A sump pump then moves the water out and away from the foundation. Modern systems often include a battery backup to keep the pump running during power outages, which is critical if you live in an area prone to heavy storms.
When choosing a sump pump, look for a cast-iron or stainless steel model with a reliable switch. Cheap pumps fail, and a failed pump during a storm means a flooded basement. Also consider a water-powered backup pump if battery maintenance is a concern. The goal is redundancy: you want a system that works even when the power goes out or the primary pump clogs.
Interior drainage does not stop water from entering; it manages it once it is inside. That is why it should be combined with vapor barriers and proper insulation to control humidity. If you are planning to finish the basement, an interior drainage system is often the most practical choice because it can be installed without excavating the exterior and it addresses the water that actually reaches your living space.
Vapor Barriers, Rigid Foam, and Insulation: The Below-Grade Envelope
Even if you have solved the liquid water problem, vapor migration remains a threat. Concrete is porous, and moisture vapor moves from the soil through the concrete into the basement. If you frame walls directly against the concrete, that vapor gets trapped, leading to mold and rot. The solution is a proper below-grade envelope: a vapor barrier, rigid foam insulation, and carefully detailed framing.
The first step is to seal the concrete walls with a waterproofing coating or a dimpled membrane. A dimpled membrane creates an air gap that allows moisture to drain down to the interior drainage system while keeping the wall dry. Next, install rigid foam insulation directly against the wall. Extruded polystyrene (XPS) or expanded polystyrene (EPS) foam is moisture-resistant and provides a thermal break, preventing condensation on the warm side of the wall. Avoid fiberglass batts against concrete; they absorb moisture and lose their R-value.
After the foam, build a 2x4 framed wall, keeping it at least 1 inch away from the foam to allow for wiring and minor imperfections. Use unfaced insulation in the stud cavities if additional R-value is needed, but ensure the foam is thick enough to keep the dew point within the foam, not in the stud cavity. Seal all penetrations and seams with caulk or spray foam. This assembly creates a dry, insulated wall that is ready for drywall.
For the floor, install a vapor barrier (6-mil polyethylene or thicker) over the concrete before adding subfloor or flooring. Tape all seams and seal the edges to the walls. If you are installing carpet, use a moisture-resistant pad. For tile or laminate, a dimpled underlayment can provide both vapor control and a level surface.
Test for Moisture After Waterproofing and Before Finishing
You have installed drainage, sealed the walls, and added insulation. Now, before you hang drywall, you must verify that your waterproofing actually works. This step is often skipped, and it is the one that separates a successful remodel from a disaster. Testing gives you the confidence to proceed and a baseline for future monitoring.
The most reliable test is the plastic sheet test. Tape a 2-foot by 2-foot square of clear polyethylene to the concrete wall and another to the floor in several locations. Seal all edges with tape. Leave them for at least 48 hours, preferably during a rainy period. If condensation forms on the outside of the plastic (the side facing the room), the air is too humid and you need better ventilation or dehumidification. If moisture forms on the inside (against the concrete), water is still migrating through the wall, and your waterproofing is incomplete.
You can also use a moisture meter to check the concrete and wood framing. A pin-type meter will give you a percentage reading. Concrete should read below 4 to 5 percent, and wood framing should be below 15 percent. If readings are higher, investigate and fix the source before proceeding. Finally, run a dehumidifier for a week and monitor the relative humidity. It should stay below 50 percent. If it creeps up, you have a hidden moisture source.
Only after passing these tests should you move forward with drywall and finishes. Document your test results with photos and dates. This record can be valuable if you ever sell the home or need to make a warranty claim on the waterproofing.
What Inspectors Look for When Signing Off on a Finished Basement
If your basement finish requires a permit (and most do), a building inspector will review your work at several stages. Understanding what they look for helps you avoid costly rework. Inspectors focus on life safety and moisture control, so your waterproofing details matter.
First, they check the vapor barrier and insulation installation. The vapor barrier must be continuous, with seams overlapped and taped, and it must be sealed to the floor and walls. Rigid foam must be installed with the proper fasteners and covered with a thermal barrier (like drywall) if it is exposed. Inspectors also look for proper clearance between the framed wall and the concrete, and they verify that no organic materials (like paper-faced insulation) are in contact with concrete.
Second, they inspect the drainage system. If you installed an interior drain and sump pump, the inspector will confirm that the sump pit is properly sized, the pump is functional, and the discharge line terminates away from the foundation. They may also check for a check valve to prevent backflow. For exterior waterproofing, they may review the contractor's documentation and verify that the membrane and drainage board were installed according to code.
Third, they check egress, electrical, and HVAC, but those are separate from waterproofing. The key point is that your waterproofing work must be visible and verifiable at the rough-in stage. Do not cover the walls until the inspector has signed off. If you are working with a contractor, make sure they schedule inspections at the right milestones. For a deeper dive into permit requirements, see our guide on whether you need a permit to finish a basement.
Choosing the Right Waterproofing Contractor
Waterproofing is specialized work, and not every general contractor is qualified to do it. When hiring a waterproofing professional, look for someone with specific experience in basement systems, not just general remodeling. Ask for references from projects similar to yours, and check online reviews and ratings. A contractor who primarily installs waterproofing systems will have better insight into your specific moisture issues.
Get at least three written estimates, and make sure each one details the scope of work, materials, and warranty. Be wary of any contractor who promises a quick fix without diagnosing the source of the water. A reputable professional will perform a thorough inspection and explain the reasoning behind their recommended solution. They will also be transparent about what is and is not covered by their warranty.
For a reliable way to find pre-vetted contractors in your area, consider using a directory service like Homes.Contractors, which connects homeowners with qualified professionals for waterproofing and other home improvement projects. Such platforms can save you time and help you compare multiple quotes without the guesswork.
Budgeting for Basement Waterproofing
Waterproofing costs vary widely depending on the method and the extent of the problem. Interior drainage systems typically run $3,000 to $7,000, while exterior excavation can cost $10,000 to $15,000 or more. Simple fixes like extending downspouts and regrading can cost less than $1,000. Vapor barriers and rigid foam insulation add another $1,500 to $3,000 for a typical basement. It is wise to budget 10 to 15 percent of your total finish budget for waterproofing and moisture control.
Do not cut corners here. The cost of waterproofing is a fraction of the cost of repairing water damage later. Moreover, a dry basement is a healthier and more comfortable living space. If you are financing your remodel, talk to your lender about including waterproofing in the loan. Many renovation loans allow you to roll waterproofing costs into the project.
Keep in mind that some waterproofing improvements may qualify for energy efficiency tax credits or rebates if they include insulation upgrades. Check with your local utility and tax advisor for details. And always get multiple quotes to ensure you are getting a fair price.
Final Steps: From Waterproofing to Finished Space
Once your waterproofing is complete, tested, and inspected, you can move forward with framing, electrical, HVAC, and drywall. But keep monitoring. Even the best waterproofing systems can be overwhelmed by extreme weather or neglected maintenance. Check your sump pump monthly, clean gutters seasonally, and watch for any new cracks or damp spots. A small investment in maintenance protects your finished basement for years to come.
Finishing a basement is one of the most rewarding home improvements, adding living space and value. By tackling waterproofing first, you ensure that your new space is dry, healthy, and durable. Take the time to diagnose, fix, and test before you finish, and you will avoid the most common and costly pitfalls. Your future self, and your home's resale value, will thank you.
Learn more about Roof Repair or Maintenance for guides, costs, and what to expect.
Compare Roof Repair or Maintenance Pros Near You
Enter your ZIP code to compare top-rated local professionals and request free quotes.